It’s absolutely freezing in Melbourne this week (despite me looking out the window at the beautiful sunny day), and although I love soups as a pescetarian I am always looking for a hearty, meat-free dinner to warm me up on weeks like this. Soup is good, as are curries, but this Lentil Shepherd’s Pie is one of my favourites.
This was the first time I’d made it in many years as Alexander has made it very clear that he doesn’t like ‘beans’ (lentils come under that category for him) and I don’t really have the time or energy to make separate dinners these days. The plan? I had a left over meat patty from the night before which I was going to warm for him and pop some of the mash and cheese from the pie on top for his own version.
Despite him not being 100% sure of exactly what it was (listen to the video at the end of this post with the sound up…), he ended up loving it!
Lentil Shepherd’s Pie is back on the menu - happy days for me.
If you’re vegetarian and/or coeliac, this recipe is also a great option for you. If you’re vegan, simply replace the cheese and butter in the mash with a vegan alternative.

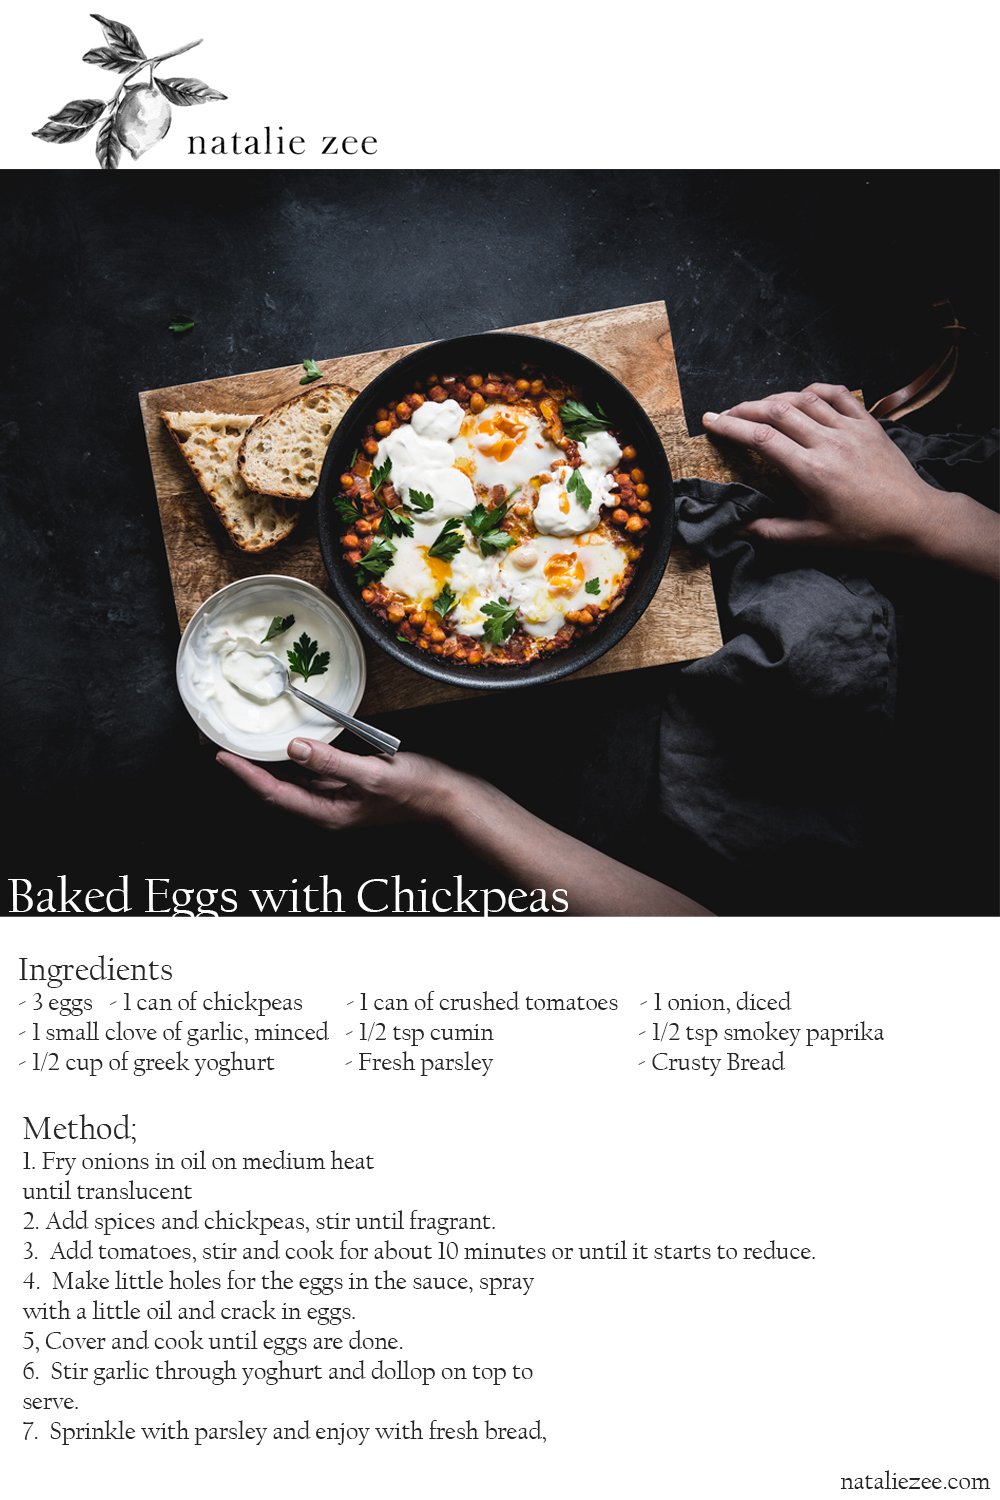
Lentil Shepherd’s Pie
Serves 6
Ingredients
- 2 brown onions, peeled and diced
- 3 large carrots, peeled and diced
- 2 cloves of garlic, finely chopped
- 250g of button mushrooms, washed and sliced
- 3 tbsp of olive oil
- 3 tbsp of tomato paste
- 1 400gm can of diced tomatoes
- 1 tsp of soy sauce or tamari
- 1 heaped tbsp of hoi sin sauce
- 3 bay leaves
- 2 425gm cans of brown lentils, drained and rinsed
For the mash
- 4 small white potatoes (or 2 large), peeled and roughly chopped
- 1 large sweet potato, peeled and roughly chopped
- 1 tbsp of butter (or dairy free alternative)
- Splash of milk of your choice
- 1 cup of grated tasty cheese (or dairy free alternative)
Method
1. In a large saucepan, place the olive oil, onions and carrots on a medium heat and cook until the onions are translucent.
2. Add the garlic, mushrooms and tomato paste and stir for 30 seconds.
3. Add the canned tomatoes then fill the can with water and add that too. Then add the soy sauce, hoi sin, bay leaves and lentils. Bring to the boil before reducing to a simmer.
4. Cook the mix stirring often for at least an hour, or until it reduces to a thick, stew-like consistency (if this happens to quickly add some more water - you want it to cook for a while to develop the flavours). Make sure you scrape down any dried saucy patches on the walls of the pot.
5. Meanwhile, boil the potatoes in salted water until soft. Drain, return to the pot and mash with the butter, before adding the milk and stirring well. Set aside.
6. When the lentil pie mix is ready, spoon it into a deep baking dish (I used one that was 20x30cm) and top with the mashed potato. It can be stored in the fridge for up to 24 hours until it’s ready to cook.
7. When you’re ready to cook, pop it in the oven at 190c for about 45 minutes or until warmed through. 10 minutes before you’re ready to take it out, sprinkle the cheese on top (I like to put it under the grill for 5 minutes too to make it extra melted and delicious).
8. Allow to rest for 5 minutes before serving.
I hope you enjoy it like Alexander did…
… despite, as you can hear above, him thinking it may have been something else (which he usually doesn’t like eating anyway!)
Stay warm,
Nat x